Why Is My Water Heater Making a Popping or Rumbling Noise
Water heaters make popping or rumbling noises primarily from sediment buildup at the tank bottom, where calcium carbonate, magnesium, and mineral deposits from hard water accumulate over years creating insulating layers that trap water beneath sediment, causing superheated water pockets to boil and burst through sediment creating distinctive popping sounds that indicate the need for professional tank flushing to prevent efficiency loss averaging 15-25%, accelerated tank corrosion, and premature water heater failure requiring complete replacement typically costing several thousand dollars in parts, labor, and potential water damage from catastrophic tank rupture.
Hearing your water heater make any type of strange noise is an unsettling experience. What’s going on and how can it be fixed?
According to Adam Rhodes, a licensed master plumber serving Greensboro and the Triad, “We respond to water heater noise complaints throughout the year, but I’d say 80% of the popping and rumbling sounds we investigate stem from sediment accumulation. Just last month, we serviced a 12-year-old water heater in Fisher Park, where the homeowner reported loud banging noises every time hot water ran. We found nearly four inches of hardened calcium deposits at the tank bottom. The drain valve was completely blocked by minerals, making flushing impossible. We recommended immediate replacement because the tank showed signs of severe internal corrosion from years of overheating, preventing what would have been a catastrophic basement flood.”
Greensboro’s water supply contains moderate mineral content typical of the Piedmont region, with hardness levels averaging 7-10 grains per gallon. While this doesn’t classify as extremely hard water, the dissolved calcium and magnesium naturally present in municipal water supplies precipitate out of solution when heated, gradually accumulating at tank bottoms over months and years of continuous operation. Homes in older Greensboro neighborhoods, including Hamilton Lakes, Irving Park, Starmount, and College Hill, often contain water heaters operating 15-20 years beyond typical 10-12 year expected lifespans, making sediment-related noise problems particularly common in these established communities.
The Usual Cause of Water Heating Noises
Sediment buildup inside the tank is the classic cause of this issue. As the heater warms up the water, the trapped sediment creates pockets where water becomes particularly hot before bursting through the buildup. Those bursts are the popping sound that you may be hearing from your water heater.
Understanding the chemistry and physics behind this process helps homeowners recognize why regular maintenance matters. Municipal water contains dissolved minerals, including calcium carbonate, magnesium, and various trace elements that remain suspended in cold water. When water heaters raise temperatures to 120-140 degrees Fahrenheit for domestic use, these dissolved minerals precipitate out of solution, falling to the tank bottom as solid sediment.
Over time, this sediment layer grows from a thin dusting to substantial accumulation measuring one to four inches thick in severely neglected tanks. The sediment doesn’t distribute evenly but instead concentrates in areas directly above heating elements in electric water heaters or above gas burners in gas-fired units. This concentrated sediment acts as insulation, creating a thermal barrier between the heat source and the bulk water volume in the tank.
As heating elements or gas burners activate, they generate intense heat that must travel through the sediment layer before reaching the water above. Water trapped beneath and within the porous sediment layer becomes superheated, often exceeding 212 degrees Fahrenheit while remaining liquid due to tank pressure preventing boiling. When this superheated water finally percolates through cracks and channels in the sediment, the sudden pressure reduction allows instant conversion to steam, creating the popping and rumbling sounds homeowners hear.
This process resembles popcorn kernels popping. The kernels contain moisture that superheats under pressure inside the kernel hull until the pressure becomes too great, causing the hull to rupture with the familiar popping sound. Similarly, superheated water trapped beneath sediment bursts through weak points in the sediment layer, creating steam pockets that produce the characteristic water heater popping noise.
Gas water heaters may produce additional rumbling sounds from the gas burner itself when sediment accumulation affects combustion air mixing or when deposits on the burner surface create uneven flame distribution. These sounds differ from sediment popping but often occur simultaneously in neglected units experiencing multiple problems.
How Does Sediment Accumulation Vary by Water Heater Type?
Sediment accumulation affects tank-style water heaters including traditional storage tank models using either gas or electric heating, with accumulation rates depending on water hardness, usage patterns, and tank maintenance history, while tankless water heaters experience minimal sediment problems because water flows through heat exchangers without storage allowing sediment to accumulate, though tankless units can develop scale buildup on heating elements requiring different maintenance procedures focused on descaling rather than tank flushing performed on traditional storage water heaters.
Traditional Tank Water Heaters
Storage tank water heaters, whether gas-fired or electric, all experience sediment accumulation because their design inherently involves storing 30-80 gallons of heated water for extended periods. This storage allows continuous precipitation of minerals from solution, with gravity pulling solid particles to the tank bottom where they accumulate over months and years.
Electric water heaters often experience more pronounced sediment problems than gas units because their heating elements sit directly in the tank bottom, creating intense localized heating that accelerates mineral precipitation in the immediate area around elements. This concentrated sediment buildup around heating elements reduces their efficiency dramatically while increasing the likelihood of element failure from overheating.
Gas water heaters position burners beneath the tank, distributing heat more evenly across the entire tank bottom. However, they still accumulate sediment, and the sediment’s insulating effect forces gas burners to run longer cycles, consuming more fuel while generating excessive heat that damages tank integrity over time.
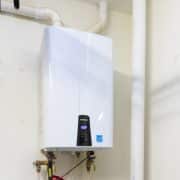
Tankless Water Heaters and Noise
This is why you don’t tend to hear these sounds from a tankless water heater, as there is nowhere for the sediment to build up. Tankless units heat water on demand as it flows through the system rather than storing large volumes, preventing the gradual sediment accumulation that causes popping noises in tank-style heaters.
However, tankless water heaters aren’t immune to mineral-related problems. Hard water causes scale buildup on the heat exchanger surfaces inside tankless units, reducing heat transfer efficiency and potentially causing flow restrictions that trigger error codes and system shutdowns. This scale buildup requires periodic descaling using specialized cleaning solutions circulated through the heat exchanger, a maintenance procedure quite different from the tank flushing required for traditional water heaters.
A Number of Problems Are Possible
You may wind up needing Greensboro water heater repair as a result of this issue. Allowing sediment to linger in the bottom of your tank can lead to many different problems over time.
Overheating the Bottom of the Tank
You can think of the sediment that has accumulated in the tank as a layer of insulation. With that insulation in place, the heating element has to work harder than it would otherwise to raise the temperature of the water, and this extra heat can do damage to the tank.
The steel tank shell itself becomes the victim of this excessive heating. Water heaters feature a glass lining protecting the steel from direct water contact, as water causes steel corrosion. This glass lining, while durable, cannot withstand the extreme localized temperatures created when sediment insulates the tank bottom from the cooling effect of bulk water volume.
Tank bottom temperatures can reach 180-200 degrees Fahrenheit or higher in severely neglected units, compared to normal 120-140 degree operating temperatures. These excessive temperatures cause the glass lining to crack, chip, and eventually fail completely in affected areas. Once the glass lining fails, water contacts bare steel, causing rapid rust formation that weakens the tank structure.
Additionally, the extreme temperature differential between the overheated tank bottom and cooler upper tank sections creates thermal stress in the steel, similar to how rapidly heating or cooling glass can cause it to crack. This thermal stress accelerates metal fatigue, making the tank more susceptible to rupture under normal operating pressure.
Reduced Efficiency
Along the same lines, you’ll also experience a drop in efficiency since the system will have to run longer and work harder to get the temperature of the water to the right level. Removing that sediment layer would allow the heater to run more efficiently once again.
Efficiency losses from sediment accumulation range from 10-30%, depending on sediment thickness and water heater type. A water heater that previously required 20 minutes to recover hot water supply after heavy use might require 30-40 minutes with heavy sediment buildup, leaving families without adequate hot water during peak usage times.
Electric water heaters show efficiency losses through increased kilowatt-hour consumption visible on utility bills. A typical 40-50 gallon electric water heater consuming 400-500 kWh monthly for a family of four might increase to 500-650 kWh with heavy sediment accumulation. At Greensboro’s average electricity rate of approximately $0.11 per kWh, this represents an extra $8-15 monthly or $100-180 annually in wasted energy costs.
Gas water heaters demonstrate reduced efficiency through longer burner run times and incomplete combustion in severe cases. The extended run times waste natural gas or propane, while the incomplete combustion from inadequate combustion air mixing can produce carbon monoxide, creating serious safety hazards in addition to efficiency concerns.
Beyond energy waste, reduced efficiency means inadequate hot water supply for household needs. Families notice they run out of hot water more quickly during showers, dishwashers don’t clean effectively with lukewarm water, and laundry washing in warm or hot water cycles doesn’t perform as expected.
Long-Term Damage
It’s possible that you will need a water heater replacement in Greensboro as a result of the overheating and pressure changes that occur with sediment buildup. You’ll find that it’s easier and less expensive to fix the problem now than to have to purchase a whole new water heater in the near future.
Water heater replacement typically becomes necessary when tanks develop leaks from corrosion perforation. Sediment accumulation dramatically accelerates this corrosion timeline by creating the perfect conditions for rust formation through glass lining damage from overheating and concentrated corrosion in areas where sediment traps water against tank surfaces.
The anode rod, a critical component in extending water heater lifespan, also suffers accelerated depletion in sediment-filled tanks. Anode rods are sacrificial components made of magnesium or aluminum that corrode preferentially compared to the steel tank, protecting the tank from rust. However, when sediment buries the anode rod or creates conditions promoting rapid electrolytic corrosion, the anode depletes much faster than the typical 5-7 year replacement interval, leaving the tank unprotected years earlier than expected.
Tank failures don’t always provide warning before catastrophic rupture. While some tanks develop slow leaks homeowners can detect through water pooling around the base, others fail suddenly and completely, releasing 40-50 gallons of hot water onto basement floors, into crawl spaces, or throughout living areas, depending on water heater location. This flooding causes extensive damage to flooring, drywall, insulation, stored possessions, and building structure, often costing thousands of dollars in water damage remediation beyond the water heater replacement itself.
Other Potential Issues
Most likely, the noises you are hearing from your water heater are related to sediment buildup. With that said, a few other problems can lead to similar sounds coming from your water heater.
Expanding and Contracting Metal Inside the Tank
Thermal expansion creates ticking, pinging, or creaking sounds as metal components heat and cool during normal water heater operation. These sounds differ from sediment popping, typically occurring as brief, sharp noises rather than prolonged rumbling.
Tank expansion happens because steel expands when heated and contracts when cooled, with the expansion coefficient for steel causing measurable dimensional changes across a 40-50 gallon tank. As the tank heats from room temperature to 120-140 degrees during initial firing or after periods of dormancy, the steel shell expands slightly. This expansion can cause the tank to rub against mounting brackets, shift against surrounding surfaces, or experience internal stress where different components expand at different rates.
The tank dip tube, a plastic tube delivering cold water to the tank bottom, also experiences thermal expansion and contraction. As hot water surrounds the tube, plastic expands more dramatically than surrounding metal, sometimes causing the tube to bow or bend, creating mechanical sounds when it contacts tank walls.
These thermal expansion sounds are generally harmless and don’t indicate problems requiring repair. However, if expansion sounds become unusually loud or occur with other symptoms like leaking, they may indicate more serious problems, including failed tank mounting, damaged internal components, or structural tank damage requiring professional evaluation.
Loose Heating Elements Within Electric Water Heaters
Electric water heaters contain threaded heating elements that screw into the tank side through gasket-sealed openings. Over time, thermal cycling, corrosion, and mechanical stress can loosen these elements, creating gaps that allow water into the element housing or permit the element to vibrate against tank walls during operation.
Loose element sounds manifest as buzzing, humming, or vibrating noises that intensify when the element actively heats. The electrical current flowing through heating elements creates electromagnetic fields that can cause physical vibration, particularly in elements that aren’t firmly mounted. This vibration transmits through the tank structure, amplifying the sound.
Beyond noise concerns, loose heating elements create serious problems. Water infiltrating element housings through compromised gaskets causes internal element damage and electrical short circuits that trip breakers or, in worst cases, create electrical shock hazards through water contact with energized components. Loose elements also corrode faster because water wicks into the threads and gasket surfaces, causing rust that further deteriorates the seal.
Testing for loose heating elements requires shutting off power at the circuit breaker, draining the tank partially, and attempting to tighten element mounting nuts with the appropriate socket wrench. This procedure requires technical knowledge and proper tools, making it a task best left to licensed plumbers or electricians familiar with water heater service.
Excess Pressure Building in the System
Modern water heaters feature temperature and pressure relief (T&P) valves designed to prevent dangerous pressure buildup that could cause tank explosions. However, systems can develop abnormal pressure conditions that create rumbling or hissing sounds before reaching levels that trigger T&P valve operation.
Pressure buildup occurs in closed plumbing systems where thermal expansion has nowhere to go. As water heats, it expands in volume. In open systems where water can push back into municipal supply lines, this expansion poses no problem. However, many modern plumbing systems include backflow preventers, pressure-reducing valves, or check valves that prevent reverse flow, creating closed systems where thermal expansion increases system pressure.
Building codes in many jurisdictions now require thermal expansion tanks to accommodate this pressure rise. These tanks contain air bladders that compress as water expands, preventing excessive pressure buildup. Systems without adequate expansion tanks can develop pressure approaching or exceeding T&P valve settings of typically 125-150 PSI, creating stress on all plumbing components while producing unusual sounds from pipes, fixtures, and the water heater itself.
Water hammer, another pressure-related phenomenon, creates loud banging noises in pipes when water flow stops suddenly. While not originating in the water heater itself, water hammer often manifests most noticeably near the water heater because of its central plumbing location and the solid metal tank that amplifies sounds transmitted through attached pipes.
Excess pressure represents a serious safety concern beyond simple noise annoyance. Extreme pressure can cause pipe failures, fixture damage, and in rare cases, tank rupture or T&P valve failure, leading to dangerous conditions. Systems showing signs of excessive pressure require immediate professional evaluation to identify causes and implement appropriate corrections through expansion tank installation, pressure-reducing valve adjustment, or T&P valve replacement.
When Should You Call a Professional Plumber Immediately?
Call a licensed plumber immediately if your water heater makes popping noises accompanied by visible water leaking from the tank or connections, hissing sounds suggesting active steam release, rumbling combined with no hot water production indicating complete heating failure, loud banging suggesting dangerous pressure levels, or any sounds accompanied by gas odors in gas water heater installations that could indicate combustion problems or gas leaks requiring emergency response to prevent fire or explosion hazards.
Emergency Warning Signs
Certain symptoms require shutting off the water heater immediately and calling for emergency plumbing service:
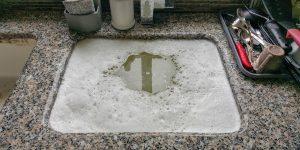
Water leaking from the tank body itself (not from connections or the T&P valve drain) indicates tank failure. Shut off power or gas and the cold water supply valve immediately. Place towels or buckets to contain leaking water and call for emergency service, as leaks typically worsen rapidly once tank perforation begins.
Gas odors near gas water heaters indicate potentially dangerous situations. Natural gas is odorized with mercaptan, providing a distinctive “rotten egg” smell. Any gas odor requires immediately shutting off the gas supply valve at the water heater, evacuating the home, and calling the gas company emergency line before calling a plumber. Never attempt to light pilots or operate any electrical switches in areas where gas odor is present.
T&P valve actively discharging water suggests dangerous temperature or pressure conditions. While these valves occasionally weep small amounts during normal thermal expansion, continuous discharge or periodic large releases indicate system problems requiring immediate attention.
How Can You Prevent Water Heater Sediment Buildup?
Prevent water heater sediment buildup through annual tank flushing where several gallons of water are drained from the tank bottom through the drain valve removing accumulated minerals, installing water softener systems that remove dissolved calcium and magnesium before water enters the heater preventing sediment formation, replacing anode rods every 5-7 years maintaining tank protection from corrosion, setting thermostat temperatures no higher than 120-125 degrees Fahrenheit reducing mineral precipitation rates, and scheduling annual professional water heater maintenance inspections allowing licensed plumbers to identify developing problems before they cause efficiency loss, component damage, or premature system failure.
Annual Tank Flushing Procedures
Annual flushing represents the single most effective preventive maintenance task for extending water heater lifespan and maintaining efficiency. The procedure involves connecting a garden hose to the drain valve at the tank bottom, running the hose to a floor drain or outside area, and opening the drain valve to release several gallons of water containing suspended sediment.
For DIY-capable homeowners, basic flushing involves draining 2-3 gallons quarterly and observing water clarity. Clear water indicates minimal sediment, while cloudy, discolored, or particle-filled water suggests significant accumulation requiring more thorough flushing. However, complete tank draining and sediment removal often requires professional service because drain valves in older units frequently become clogged by the very sediment they’re meant to remove, and full draining requires proper air gap creation to prevent vacuum locks.
Professional plumbers use specialized tools and procedures for thorough sediment removal, including reverse-flushing techniques that use water pressure to break up compacted sediment, chemical treatments that dissolve mineral deposits, and drain valve replacement when existing valves are too clogged for effective service.
Water Softener Benefits
Whole-house water softener systems prevent sediment formation by removing dissolved calcium and magnesium before water enters the heater through ion exchange processes. Water softeners replace hardness minerals with sodium or potassium, producing “soft” water that doesn’t precipitate minerals when heated.
Homes with water softeners experience dramatically reduced sediment accumulation, often extending water heater lifespan by 5-7 years beyond unsoftened water installations. The efficiency benefits also compound over time, with softened water systems maintaining like-new performance for years rather than gradually declining as sediment accumulates.
However, water softeners represent significant upfront investment and require ongoing maintenance, including salt replenishment and periodic resin bed cleaning. Homeowners should evaluate local water hardness through professional testing before deciding if softener installation makes economic sense for their situation.
Ultimately, You Don’t Need to Figure Out What Is Wrong with Your Water Heater
Ultimately, you don’t need to figure out what is wrong with your water heater, because that’s a job for the professionals at Berico. If you are hearing sounds that you know shouldn’t be coming from the unit, give a call to the Berico team and schedule an appointment right away.
Professional diagnosis provides value beyond what homeowners can accomplish through DIY troubleshooting. Licensed master plumbers have specialized tools, including tank inspection cameras, acoustic listening devices, thermal imaging equipment, pressure gauges, and water quality testing kits that reveal problems invisible to visual inspection or casual observation.
Berico’s plumbers also understand the interconnections between water heaters and other home systems. Water heater problems sometimes stem from or contribute to broader plumbing issues, including inadequate pressure regulation, thermal expansion concerns affecting multiple fixtures, or electrical problems causing heating element failure. Comprehensive diagnosis addresses these system-wide concerns rather than treating only immediate symptoms.
Put Experience on Your Side
This type of project is too important to trust to just any contractor. You need someone who is trained and experienced in exactly this type of work, and that’s what you’ll get with Berico. Whether you need to fix an old water heater or have a new one installed at your home in Burlington, you will have the right partner for the job.
For over a century, families throughout Greensboro, High Point, Burlington, and the surrounding Triad have trusted Berico’s licensed master plumbers for water heater service that prioritizes safety, efficiency, and long-term reliability. Our plumbers have serviced virtually every water heater brand, age, and configuration installed in the region, from 40-year-old tanks in historic Fisher Park homes to the latest high-efficiency models in newer developments.
Berico’s comprehensive home comfort expertise extends beyond plumbing to include HVAC, electrical, and fuel delivery services, ensuring we understand how all your home systems interact and can provide integrated solutions addressing multiple concerns during single service visits. When our plumbers service your water heater, they also evaluate related systems, including electrical supply, ventilation, drainage, and combustion air supply for gas units, providing thorough service that prevents future problems.
Our technicians serve neighborhoods throughout the Triad, including Irving Park, Hamilton Lakes, Starmount, College Hill, Lindley Park, Sunset Hills, Friendly Acres, and Adams Farm, with the responsive service Greensboro families depend on for maintaining comfortable, safe, efficient homes. Whether you need emergency water heater repair, routine maintenance, or complete replacement, Berico provides one trusted partner for all your home comfort needs.
Contact Berico today to schedule water heater service. Our experienced plumbers will diagnose your water heater problems accurately, explain your options clearly, and complete repairs or replacements that restore reliable hot water to your home while preventing the efficiency loss, safety hazards, and potential water damage that neglected water heater problems create.
Frequently Asked Questions About Water Heater Noises
Can I flush my water heater myself to remove sediment?
Homeowners with basic DIY skills can perform partial water heater flushing by connecting a garden hose to the drain valve and releasing 2-3 gallons of water quarterly to remove loose sediment, but complete tank draining often requires professional service because drain valves in older units frequently clog with the sediment they’re meant to remove, and heavily compacted sediment may require reverse-flushing techniques, chemical treatments, and specialized tools that licensed plumbers use to break up mineral deposits that simple draining cannot remove effectively.
How often should I flush my water heater to prevent sediment buildup?
Water heaters should be flushed annually at minimum to prevent problematic sediment accumulation, with homes having hard water exceeding 10 grains per gallon potentially requiring semi-annual flushing, while quarterly partial flushing where homeowners drain 2-3 gallons of water checking for sediment provides early warning of developing problems between annual professional service visits that include complete tank draining, anode rod inspection, and comprehensive system evaluation ensuring optimal performance and maximum lifespan from your water heating equipment.
Is a popping or rumbling water heater dangerous?
Popping and rumbling water heaters indicate sediment accumulation that reduces efficiency and accelerates tank corrosion but doesn’t typically create immediate danger, however these sounds combined with other symptoms including water leaking from the tank, hissing suggesting steam release, gas odors near gas water heaters, or T&P valve continuously discharging water indicate potentially dangerous conditions requiring immediate professional evaluation because extreme sediment buildup can contribute to overheating, excessive pressure, tank rupture, or in gas units combustion problems that create safety hazards requiring emergency plumbing service.
How much does it cost to flush a water heater in Greensboro?
Professional water heater flushing costs vary based on tank condition, accessibility, and whether drain valve replacement becomes necessary when existing valves are too clogged for effective service, with routine maintenance flushing typically representing affordable preventive care compared to emergency repair costs from sediment-related damage, efficiency losses costing $100-180 annually in wasted energy, or premature water heater replacement requiring investment of several thousand dollars in equipment, installation, and potential water damage remediation if tank failure causes flooding before replacement occurs.
What causes sediment to build up in water heaters?
Sediment forms when dissolved minerals including calcium carbonate and magnesium naturally present in municipal water supplies precipitate out of solution as water heaters raise temperatures to 120-140 degrees Fahrenheit for domestic use, with the solid mineral particles falling by gravity to tank bottoms where they accumulate over months and years, with accumulation rates depending on water hardness levels that average 7-10 grains per gallon in Greensboro’s Piedmont region water supply, usage patterns, thermostat temperature settings, and maintenance history including whether tanks receive annual flushing removing accumulated deposits.
When should I replace my water heater instead of repairing it?
Replace water heaters when tanks develop leaks from corrosion perforation, when units exceed 12-15 years of age and experience frequent component failures making ongoing repairs uneconomical, when sediment buildup is so severe that flushing cannot restore adequate performance, when thermostat or heating element problems recur despite repairs indicating fundamental system deterioration, when energy efficiency has declined to the point where monthly operating costs approach the amortized cost of new high-efficiency replacement, or when current capacity no longer meets household needs making upgrade to larger or tankless systems appropriate for changing family requirements.
Does Greensboro’s water quality make sediment problems worse?
Greensboro’s municipal water supply contains moderate mineral content typical of Piedmont region water sources with hardness averaging 7-10 grains per gallon, which doesn’t classify as extremely hard water like some regions experiencing 15-20+ grains per gallon but still causes noticeable sediment accumulation over time, with homes in older neighborhoods including Fisher Park, Irving Park, Hamilton Lakes, and College Hill often containing water heaters operating 15-20 years that show significant sediment deposits requiring professional flushing or replacement to restore efficiency and prevent tank failure from corrosion damage accelerated by years of mineral accumulation.
What’s the difference between popping, rumbling, and banging water heater sounds?
Popping sounds indicate sediment-related steam bubble formation as superheated water trapped beneath mineral deposits bursts through sediment layers, rumbling suggests either heavy sediment accumulation or gas burner combustion problems in gas water heaters, banging noises typically indicate water hammer from sudden water flow changes in connected plumbing rather than water heater problems, hissing sounds suggest active steam formation from extreme overheating or T&P valve discharge, and buzzing or humming indicates loose heating elements in electric water heaters vibrating during operation, with accurate diagnosis requiring professional evaluation because multiple problems often occur simultaneously in neglected units.

 You need a whole house surge protector in Greensboro because the region experiences frequent storms, lightning activity, and grid fluctuations that send damaging voltage spikes into homes, and because everyday internal surges from appliances cycling on and off quietly degrade electronics and HVAC equipment over time. Using a
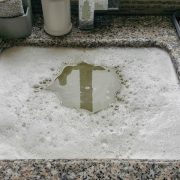


 Electric vehicles are more popular than ever, and more hit the road every day. If you are joining this movement, hiring a Greensboro electrician to add a charger to your home is an important step. But before the work begins, your electrical system needs to be evaluated carefully. Not every home is ready out of the box, and the gap between “probably fine” and “confirmed ready” is one that only a licensed professional can close.