Is Automatic Propane Delivery Worth It in Eden, NC?
Yes, automatic propane delivery is worth it for most Eden homeowners because it eliminates the risk of running out of fuel during cold weather, removes the burden of monitoring tank levels, and keeps propane available even during periods of high seasonal demand when will-call customers may face delivery delays. For propane delivery in Eden, you have two basic choices. You can monitor your tank and call when you need more, or you can set up an automatic delivery service with a provider like Berico. This page will explore how to choose between the two.
Propane is the primary heating fuel for a significant share of homes and businesses in Eden and throughout Rockingham County, particularly in areas without access to natural gas infrastructure. When temperatures drop during a Piedmont winter, propane demand can spike quickly, and the difference between a full tank and an empty one is not just a matter of comfort. It is a safety issue that can also require an expensive service call to perform a system safety inspection before the equipment can be restarted.
Automatic Propane Delivery vs. Will-Call Delivery: What Is the Difference?
Automatic propane delivery means your supplier schedules and makes deliveries based on your usage history and weather data, while will-call delivery means you monitor your own tank and contact the supplier when you need a refill, which puts the responsibility entirely on you to avoid running out.
Will-call delivery works for customers who closely monitor their tanks and are comfortable placing orders in advance of running low. The limitation is that will-call customers are competing for delivery slots with everyone else who calls at the same time. During a cold snap in Eden, when temperatures drop into the teens and propane furnaces run continuously, demand surges quickly. A will-call customer who waits too long may face a multi-day wait for delivery while the tank runs toward empty.
Automatic delivery removes that uncertainty entirely. Your delivery provider manages the schedule on your behalf, using data rather than your memory of the last time you checked the gauge.
Automatic Propane Delivery Makes Life Easier
The primary advantage of automatic propane delivery is found in how it greatly reduces the risk of running out of fuel. You won’t have to actively monitor your tank level, as the propane delivery company will be in charge of keeping it filled up throughout the year. This is particularly important during the winter months when propane usage can be vital for running a furnace.
For Eden homeowners who rely on propane not just for heat but for water heating, cooking, and backup generators, keeping the tank above a safe level is not optional. A runout affects all of those systems at once, not just one appliance.
How Does Automatic Propane Delivery Work?
Automatic propane delivery works by using degree day calculations, your historical fuel consumption, tank size, and home dimensions to predict when your tank will reach a threshold level, and scheduling a delivery before that point is reached.
A number of factors are taken into account when building a delivery schedule for your property. Specifically, things like your historical fuel usage, weather patterns, and seasonal demand will all be factored into the equation. The system will be designed to maintain safe fuel levels that keep you comfortably away from a situation where you may run out.
The degree day calculation is the core of this system. A heating degree day is a unit that measures how much colder a given day was than a baseline temperature of 65 degrees Fahrenheit. The colder the day, the higher the degree day value, and the more propane a typical home will burn. Berico of Eden tracks degree day accumulations in the Rockingham County area to adjust delivery timing based on actual local weather, not a fixed calendar schedule. A mild December may push a delivery back by a week or two. A hard January cold snap accelerates it.
Once your automatic delivery schedule is set and in place, you’ll barely need to think about propane at all. It will simply show up periodically, your tank will stay well-stocked, and you can spend your time thinking about other things in life.
“In Eden, we see the consequences of will-call delivery go wrong most often in January and February, when we get a sustained cold stretch, and everyone calls at once. Automatic customers never see that problem because we already have them scheduled. The degree day system means we know their tank is getting low before they do. If you have ever had to call for an emergency delivery on a cold night, automatic service is the answer to making sure that never happens again.”
, Fuel Delivery Specialist, Berico of Eden
There’s a Lot to Like About Automatic Delivery
Automatic propane delivery offers a combination of convenience, safety, and supply reliability that will-call delivery cannot match, particularly during the high-demand winter months when scheduling delays are most likely to affect customers who manage their own tank levels.
Any list of benefits related to automatic propane delivery should include at least the following points, if not others:
- No need to monitor your tank. With automatic delivery, more propane will be arriving at a set schedule, and you won’t need to worry about it. You don’t have to remember to check your tank’s levels frequently, and you don’t have to call to schedule a delivery.
- Less risk of running out. Working with an experienced provider like Berico makes it easy to set up a delivery schedule that will keep you safely away from any risk of running out of fuel.
- Reliable availability. If you call during a period of high demand when you suddenly realize that your tank is low, you might not get a delivery right away. You can avoid this situation by staying ahead of the game and getting on a set schedule that will keep you at the front of the line.
- More convenience. It’s already convenient to have propane delivered to your property, but the experience gets even more convenient when you don’t have to worry about managing it along the way.
- Safety protection against runout. Running completely out of propane is more serious than simply being cold. When a tank runs empty, air and moisture can enter the fuel lines, and a licensed technician must perform a pressure test and safety inspection before the system can be safely restarted. Automatic delivery prevents runouts from occurring in the first place.
What Happens If You Run Out of Propane?
Running out of propane requires more than just a delivery to resolve: when a tank empties completely, federal safety regulations require a pressure test and leak check of the entire system before it can be restarted, which means additional time without heat and an additional service call.
For businesses in Eden and Rockingham County that rely on propane for cooking, manufacturing processes, or forklifts, running out is an operational risk that hits immediately. A restaurant that runs out mid-service, or a warehouse that cannot run its equipment because the tank is empty, faces immediate revenue impact on top of the delivery and inspection costs. The cost and inconvenience of that situation are far greater than simply maintaining an automatic delivery schedule that keeps the tank from reaching that point.
Berico of Eden’s automatic delivery service is specifically designed to prevent runouts. Their scheduling system, which accounts for outdoor temperatures, tank size, and home dimensions, keeps customers well above the level where a safety inspection would be required.
Switching to Automatic Propane Delivery with Berico of Eden
Switching to automatic propane delivery with Berico of Eden is straightforward, and new customers receive a free propane tank swap, Bonus Bucks rewards, and referral credits as part of the changeover process, with no installation fee for most above-ground tank replacements.
If you are currently with another propane supplier and considering a switch, Berico makes the changeover free and easy. Recent regulations mean that your current propane tanks are likely owned by your existing supplier, but Berico can assist with the free changeover process, including swapping the tank. There is no reason to stay with a supplier that is not meeting your needs when switching costs nothing and comes with added perks.
Berico has been serving customers since 1924. That deep experience with fuel delivery across the region is built into how automatic delivery schedules are set and managed for every customer in the Eden area.
Take One More Thing Off Your Plate
Instead of having to stay on top of propane tank monitoring in Eden on your own, get on a regular schedule with Berico and spend your time on other things. Having Eden propane delivered shouldn’t be a hassle or a source of stress. The Berico team has been making it easy for families in this area for generations, and you can be next.
Whether you are a new propane customer, a will-call customer considering a switch to automatic service, or someone who has had a runout and wants to make sure it never happens again, the team at Berico is ready to help you get set up on a schedule that works for your home and your fuel usage.
Frequently Asked Questions About Automatic Propane Delivery in Eden
How does automatic propane delivery work?
Automatic propane delivery uses degree day calculations, your historical fuel usage, tank size, and home dimensions to predict when your tank will need a refill and schedules a delivery before the level drops too low. You do not need to monitor the tank or call to place an order. The delivery provider manages the schedule based on weather data and your usage history.
What is the difference between automatic and will-call propane delivery?
With automatic delivery, your supplier schedules and makes deliveries based on your usage data and weather, so you never have to think about your tank level. With will-call delivery, you are responsible for monitoring your tank and placing orders before you run low. Will-call works if you are diligent about monitoring, but it carries the risk of running out during high-demand periods when delivery slots fill quickly.
Can I switch from will-call to automatic propane delivery with Berico?
Yes. Berico of Eden makes it straightforward to switch from will-call to automatic delivery, and new customers switching from another supplier receive a free tank swap as part of the changeover process. Contact Berico of Eden to get started and discuss the delivery schedule that fits your home’s fuel usage.
What happens if I run out of propane even with automatic delivery?
Berico’s automatic delivery system is designed to prevent runouts by scheduling deliveries before your tank reaches a critically low level. In the rare event that an unexpected usage spike or extended cold period results in a very low tank, Berico of Eden can arrange a priority delivery for automatic customers. Running completely out requires a safety inspection before the system can restart, which is exactly the situation automatic delivery is designed to avoid.

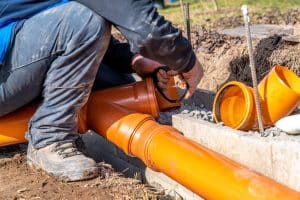 The five most reliable signs that you need professional sewer line cleaning are repeated drain backups, slow drains throughout the house, sewer odors, gurgling plumbing sounds, and wet or unusually green patches in the yard. When was the last time you thought about your sewer line? It has probably been a while, if you are like most homeowners. However,

 You need a whole house surge protector in Greensboro because the region experiences frequent storms, lightning activity, and grid fluctuations that send damaging voltage spikes into homes, and because everyday internal surges from appliances cycling on and off quietly degrade electronics and HVAC equipment over time. Using a